This guide follows the structure of the “Document an Occurrence” data sheet, each of these sections on this page will provide you the information you need to collect all the required data and ultimately complete your study. We have also developed a study protocol which provides a checklist for the studies.
Download the Document an Occurrence data sheet
Download the Document an Occurrence data sheet for Excel
So, you have decided to do a “Document and Occurrence” study. Document and Occurrence has the most straightforward protocol out of all the Great Lakes Worm Watch studies. To “document” an earthworm location you need to collect two pieces of data: a geographic coordinate from a single sample area and a note of earthworm presence/absence in that sample area. To do this all you need to do is find an area where you would like to sample, look for the presence/absence of earthworms in a sample area and then document the geographic coordinate using a GPS unit or online mapping software. This is the only type of Great Lakes Worm Watch study that does not require the collection and preservation of earthworms, although we will not turn down any earthworms you want to send, but Single and Multiple Plot Studies are designed specifically for the collection and preservation of earthworms!
Depending on what you would like to get out of a Great Lakes Worm Watch study, you may be interested in the ways you can analyze the data you have collected. A vast majority of our Great Lakes Worm Watch contributors get involved as part of educational projects with specific analytical aims, so it may be important to understand how each study level affects what you can do with the data collected. It is important to remember that data analyses is only OPTIONAL, the Great Lakes Worm Watch does not require you to analyze your data in any form before you submit the information collected. All additional information on how to analyze your data can be found in the ‘Earthworm Analysis’ section of the Great Lakes Worm Watch site or in the ‘Analyzing Your Data’ section at the bottom of this page.
Choosing a Site
The first thing you need to do is find a site where you would like to sample. A site is a particular habitat in which you would like to sample, such as a forest or field. Many people already have an area in mind, but natural ecosystems including forests, woodlands, and prairies are especially interesting to us at the Great Lakes Worm Watch. However, data from habitats dominated by human activity are also of value, such as farm fields, pastures, and parks.
Once you have a found an appropriate site you are ready to begin you study! It is useful to find out the name of your site for future studies, if your sample site does not have a given name (e.g. Superior National Forest, MN) you can always name it yourself with something relating to its surrounding features (e.g. Boulder Lake Forested Area, MN).
We always ask for a little contact information about the study coordinator this is only used by Great Lakes Worm Watch staff.
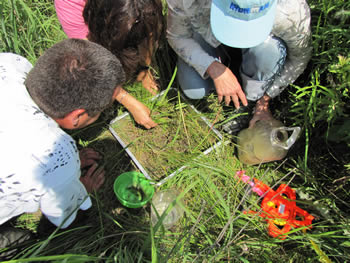
Sampling Area
A sample area is the section of soil in which you sample your earthworms inside of your site. Both “Document and Occurrence” and “Single Plot Studies” look for earthworms in ONE sample area, so if you want to calculate earthworm occurrence over a large scale (using transects etc.) then a “Multiple Plot Study” may be most applicable for you.
You do not need to use a set area of ground for your sample in “Document an Occurrence” studies. Sampling from an area of a particular size (33 x 33 cm plot) can allow you to work out the density of earthworms. These ‘fixed’ plots’ have a set area from which you sample and the most basic plot is a 33 x 33 cm square.
Generating a Single Geographic Coordinate
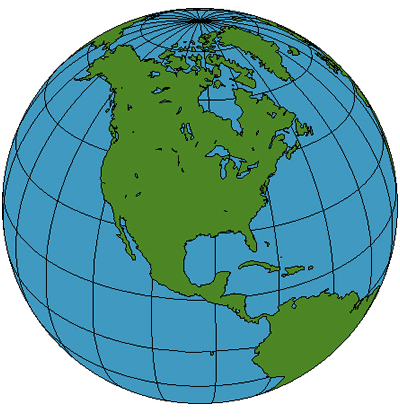
The First and probably most important piece of data you need to find out is the geographic coordinate of your site. This geographic coordinate allows us to place your findings on a map in order to document the distribution of earthworms. Providing accurate geographic coordinates is essential! It may sound extreme but earthworm sightings are basically useless without an accurate geographic coordinate. You only need to provide a single geographic coordinate for your site.
There are two methods that you can use to calculate the geographic coordinate of your site: a GPS unit or the mapping website iTouchMap (we have developed guides for using either). If you already have access to a GPS unit then use this to find your sites geographic coordinate. If you don’t have access to a handheld GPS unit don’t worry iTouchMap can easily produce coordinates for your site using a Google Maps style webpage.
There are different formats of writing longitude and latitude coordinates, for consistency we use the Decimal Degree format (i.e. 44.98127° latitude, -93.34479° longitude). The more numbers reported after the decimal point, the better your accuracy. We ask for at least 5 decimal places to give a reading with at least 50-100 meter accuracy. By convention, the latitude value is listed first, then the longitude value, separated by a comma.
There are several other commonly used and similar looking coordinate formats that may look similar (all numerical) but are actually very different. Just as 5 feet is very different to 5 meters, a coordinate given in Decimal Degrees-Seconds is very different than a coordinate in Decimal Degrees.
Read more about the coordinate systems, and the fundamentals mapping technology
Detailed instructions on how to locate map points
Using a GPS Unit
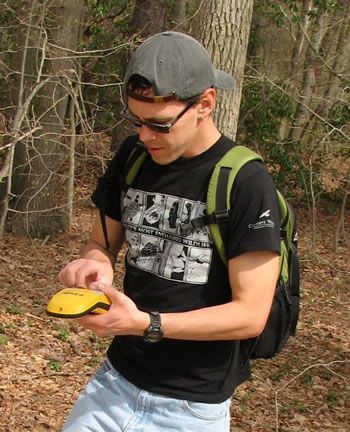
If you have a handheld GPS unit you will need to be able to create a waypoint in decimal degree format, read the accuracy of your GPS unit and change the format settings. You will need to note the:
- Geographic Coordinate - set ‘Coordinate Units’ to decimal degrees (hddd,ddddd°)
- Accuracy reading - set ‘Distance/speed’ to metric units
- Datum - set Map DATUM to NAD83
You need to check your GPS unit and make sure each is set to their correct respective units. You can use the guide bellow to check and change your GPS settings.
How to format the options and settings of your GPS unit .
To find the geographic coordinate simply stand over your sample area whilst holding your GPS unit. The accuracy of your GPS unit is found on the map screen and is usually indicated quite clearly in a box entitled ‘ACURACY’ with an M for meters. This value should be written down on your data sheet before you calculate your waypoint (ideally below 5 meters for best reading).
Once this is noted down you can make a waypoint. This is most commonly done by pressing and hold the ‘Enter’ button on the map screenuntilanew ‘waypoint’screen appears. The ‘LOCATION’ box will contain the geographic location of your sample area (e.g. N 44.98127° W -93.34473°). You should write down this value but you can also save your waypoint coordinate information onto the internal memory of your GPS unit.
Guide for creating waypoints using a GPS unit
You can check the Datum of your GPS unit at any point by finding the ‘Units’ screen in your GPS internal settings and writing down the value in the‘Map Datum’ option.
Using iTouchMap
If you do not have access to a handheld GPS unit you can use the mapping website iTouchMap. There are MANY other mapping websites but we have chosen to provide instruction on using iTouchMap because it is easy to find the latitude and longitude in the format we request (decimal degrees). You will need to record the:
- Geographic coordinate - in the ‘Get the Latitude and Longitude of a Point’ section
- Datum - always WGS84 for iTouchMap
If you are experienced with using Google Maps, using iTouchMap should be very straightforward. You can find for the approximate location of your site by typing its address (or a surrounding landmarks) ‘Address’ search box and clicking the enter key. This magnifies and moves your map screen around to the area you searched. You can then pan to your site and zoom into the exact location of you individual sample area. If it is difficult to see you site try switching to ‘hybrid’ mode to see aerial images as well as labeled roads etc.
Once you have zoomed in as much as possible you can left click on your mouse to create a blue marker over you sample location. This will produce two values in the ‘Latitude’ and ‘Longitude’ box directly below ‘Get the Latitude and Longitude of a Point’ title, these are the geographic coordinates of your sample area, whichyou can write down onto your data sheet (and/or copy these into a word document) making sure you write them down to 5 decimal places. If you want to replace or move marker delete it by simply right clicking your mouse over the marker.
Don’t worry if you can’t exactly find your sample area from the aerial images, just give the coordinate to the best detail you can. Using iTouchMap is a good way to find a map coordinate but it allows large amounts of room for human error so is rarely as good as a GPS unit. If you want a more detailed guide to using iTouchMap we have developed a guide that follows as lesson like tutorial (see link below).
Sampling Methods
As “Document an Occurrence” simply looks for the presence or absence of earthworms so it does not matter which earthworm sampling method you use. Midden counts, flip and strip and hand sampling methods miss out certain species of earthworm and cannot be used to determine the complete number of earthworms species in your site. Mustard sampling on the other hand allows the sampling of all earthworm species in the soil, which makes it the most useful of all the methods. If you want to use this method and send in earthworms to the Great Lakes Worm Watch you may want to look at the Single and Multiple Plot Studies.
If you are collecting earthworms place them into a collection tray with isopropyl alcohol for temporary preservation (we recommend Tupperware with a lid). You can always use gloves instead of forceps when collecting earthworms. Preferably use gloves instead of forceps when collecting worms as forceps can often break earthworms
Flip and Strip
Literally, flip logs & rocks, strip off bark, root around, under and through litter and see what you find. This sampling emphasizes litter dwelling (epigeic) and some soil dwelling (endogeic) species, you may occasionally get a nightcrawler (deep dwelling or anecic) if they occupy the site.
Hand Sampling
Take a shovel or hand spade and dig up some soil. Sift through it with your fingers looking for worms. To get a good sample, be sure to dig to a depth of at least 15 cm, 30 cm is even better, especially if you are interested in getting any endogeic species that might be present. It’s handy to have a piece of plastic or tarp to pile the excavated soil on. Pile the shovels full of soil on one end, grab handfuls of soil and sift it through your fingers. You should not have to sift the soil through a screen, simply by grabbing handfuls and sifting it through your fingers with reasonable care you will find most of the earthworms present, but be sure to break up clumps of soil, they are often in those clumps.
Midden Counts
The anecic species, Lumbricus terrestris, also known as the nightcrawlers, form distinctive piles of cast material (earthworm poop) around the openings to their deep vertical burrows. The pile, called a midden, is usually about 2-5cm in diameter and 1-2cm in height with a burrow hole, 2-4mm in diameter, near the center. The cast material is dark brown to black in color and has a distinctive smooth-globular texture, rather than the angular or crumb structure you would see in native soils. Because nightcrawlers drag whole leaves into their burrows, the opening of the midden will often be covered with a mat of leaf petioles (the leaf stem) and other fragments of leaves. Watch for these telltale signs and once you develop an eye for them, you will find that middens are readily identifiable.
Liquid Mustard Extraction

“Single Plot Studies” uses mustard sampling as it is the most effective and comprehensive method of earthworm sampling. It allows the sampling of all earthworm species in the soil.
In this method you pour a solution of mustard water on the soil allowing it to percolate down. The mustard solution irritates the skin of earthworms and they come to the surface to avoid it, where they can be collected, preserved and identified. This technique works well for all species of earthworms but only when the earthworms are active. If it has been very dry, very hot or very cold in the week(s) prior to sampling they may not respond as very well since they may be in aestivation (earthworm version of hibernation). To make the solution, mix 4 liters (~1 gallon) of water with 40 grams (~1/3rd cup) ground yellow mustard seed. This is the same non organic yellow mustard you will find in the spice rack in any grocery store. In contrast, if air temperatures have been moderate and it has rained recently they are likely to be active and respond well to the liquid extraction. AN EXCEPTION – if the soil is very compacted and/or has a poor structure (heavy clay, fields, roads, etc.) the extractant doesn’t move well through the soil and the earthworms will not respond because the liquid doesn’t reach them. BUT, in most hardwood forests of our region the liquid extraction method works very well. Try it, it’s fun!

Method
- Slowly pour about half of the jug of mustard solution over the area allowing it to soak in as much as possible. If worms are present and active they should begin coming up almost immediately. If they don’t come up immediately, wait 2 minutes or so and then pour again. A forceps is handy for picking the earthworms up off the surface.
- After a few minutes, and the initial flush of earthworms slows down, pour more of the solution over the sample area. You will probably get another flush of earthworms coming to the surface. Continue this until the whole gallon is used up (2 or 3 pourings). Deeper dwelling species take longer to surface than those close to the surface to don’t be too impatient. Total sample time is usually 5-10 minutes.
- As earthworms appear at the surface wait until they are completely out to the ground before grabbing them with forceps. If they are not completely out of the ground they may break. Place them into a collection tray with isopropyl alcohol for temporary preservation(we recommend Tupperware with a lid). You can always use gloves instead of forceps when collecting earthworms.
Read more about earthworm collection methods and their limitations.
You can also collect simple soil information this is not essential for us but may be useful or interesting for you to investigate. The data sheet has an optional section for habitat and soil data.
A given site (nature center, school forest, etc.) may have several different habitat types (hardwood forests, conifer forests, restored prairie, wetlands, etc.). In general, you want to report your data for each habitat separately so the data sheet includes a section to help you describe your habitat in a general but valuable manner, including habitat type, current and past disturbance, habitat size, surrounding land use and some basic soil features.
The level of impact of an earthworm invasion can, in part, be seen through the affects on the forest soils. When there are lots of earthworms the formerly thick forest floor (duff layer) composed of slowly decomposing leaves is eaten and mixed into the mineral soil below. So, for plot based surveys, we ask you to tell us how much exposed bare soil there is, some features of the forest floor, and to do a simple soil texture test. To read more about how, click here. If you want to explore other aspects of the forest soils, click here check out the soil sampling methods section.
Preservation (optional)
Once you have earthworms, what do you do with them? If you are documenting an earthworm occurrence you don’t need to send in earthworms (which requires preservation) but by preserving earthworms you can save your specimens for identification later. You can always preserve and send in your earthworms if you have collected them, but this does require you to have certain items of equipment.
You will need:
- Isopropyl alcohol
- Alcohol For immediate preservation
- Leak Proof vial(s) For transportation
- Formalin For final preservation
- Gloves for handling earthworms and chemicals
1. Kill the earthworms in alcohol (isopropyl – rubbing alcohol works great)
- Get as much dirt off the earthworms as possible. Put the earthworms in the alcohol one at a time (rather than a whole handful all at once) so they don’t get tangled up into a big mess of earthworms. After a few seconds, the earthworm will become anesthetized and relax into a mostly extended position.
- Place the anesthetized earthworms into a vial. You can keep the earthworms in alcohol for up to 24 hours (keeping them cool and out of direct sunlight). But don’t wait to long, after a day or so in alcohol they start to get mushy.
2. Put the earthworms in Formalin (within 24 hours).
- Place the earthworms in a leak proof vial and cover them in Formalin (a cellular fixative that will prepare the specimens for long-term storage).
- Once the earthworms have been in formalin for at least 24 hours, they can be placed back into alcohol (70-100% isopropyl, NOT ethyl which bleaches any pigmentation) for long-term storage. This allows you to re-use the formalin over and over again.
- CAUTION: Formalin is a dangerous chemical and safety precautions must be taken. It should be used only in a well ventilated area. It should not be breathed, swallowed or come in contact with bare skin or eyes. If external contact does occur wash the area with large amounts of water. If ingested contact a poison control center immediately. Formalin has been shown to cause cancer in laboratory animals.
Download the full preservation equipment list and protocol
Read more about earthworm preservation
Guides and shops to buying the equipment
Sending your Findings to the Great Lakes Worm Watch
You can ether send you printed data sheet vial mail or by emailing a copy of the digital data sheet to the Great Lakes Worm Watch ([email protected]).
Mail and packing instructions.
Label, pack and ship all sample vials (with location information!) to:
Great Lakes Worm Watch
Natural Resources Research Institute, University of Minnesota,
5013 Miller Trunk Hwy,
Duluth, MN 55811
CitSci.org
Citci.org is a website that acts as a base for many citizen science projects around the US. We are currently altering the structure of the Great Lakes Worm Watch CitSci page to improve its usability. Check back soon!
Analysing your Data (optional)
If you have collected earthworms from a set area and have list of earthworm species you can carry out many statistical tests. The Document and Occurrence style of study has fairly limited opportunities for data analysis as may involve none of these. Sending your collected earthworms to the GLWW is only optional in a Document an Occurrence style study. Both Single and Multiple Plot Studies require the collection of earthworms. When you send your earthworms to the Great Lakes Worm Watch our scientists indentify the species in your sample(s) for you. You can use our species list to check how effective you are at identifying earthworms! If this identification aspect sounds enjoyable to you, you may want to look at conducting a Single and Multiple plot study. Mustard sampling on the other hand provides a fully representative sample of the earthworm species in the soil, which is why it is the only earthworm sampling method used in Single and Multiple plot studies.
More information on earthworm analysis.
Other simple modifications to your study like using a set sampling area (or plot) can drastically increase your data analysis opportunities. Counting the number of earthworms alongside a set plot area allows you to calculate earthworm density. If you have collected and identified worms you can then use this plot size to work out and compare the densities of a particular species.